Visit SummerOfFunBlog.com Keep up with all of Lian's Adventures.

Lian's Summer of Fun

Sunday, July 29, 2012

We Give Books: Twisters


I am going to try to tell you about the books I read at We Give Books. They are really terrific. Plus, maybe if I talk about them I will read more of them. 

This week I read a book called Twisters by Kate Hayden


http://www.wegivebooks.org/books/dk-readers-twisters


This book told me lots of neat things about twisters. There is a  page that lists the sizes and another that tells about different kinds. There are really great stories, like the one about a baby that got picked up by a twister and moved 300 ft without ever waking up and another about a man who had his birth certificate blown miles away to land in his own friend's yard.  I also read about how they track twisters with satellites and how you should build a room underground to stay safe during a twister. 

The book had lots of great information and neat pictures. I have read it again already.
Friday, July 27, 2012

Lian's California Salad


Last semester, for social studies, I had to invent a product where all the parts were made or grown in California, because that is where I am from.  I made a salad from different crops that are grown here. I even had a map showing where the crops were grown and I drew a picture of the salad. For Fun Food Friday I made it into a real Salad. I used Mom's homemade house dressing for the salad. It's my favorite dressing so she named it after me.

What you need for the salad:
1 head of any kind of lettuce. We use green leaf, red leaf or romaine
1 onion, any kind. We use white, red, yellow or brown.
3 green onions
1 tomato
1 cucumber
1 carrot
1/2 green pepper
A few heads of broccoli

Add ons:
Any kind of veggies you like in a salad
You can also add cheese pieces or chunks of meat

Directions: 
Have a grown up cut up the veggies into bite size pieces. Then tear the lettuce in small pieces. Mix it all together.


What you need for the dressing:
1 cup of skim sour cream
1/3 c of skim milk
The seasonings you like. We use garlic and onion powder, and black pepper.
Grated Parmesan cheese to taste. I also add cheddar sprinkles.

Directions: Mix the seasonings and cheese into the sour cream. Use as much as you like it to be. Add 1/2 the milk and whisk it until it's smooth. Then add more milk until it is as thick as you want it. If it gets too thin add more sour cream.


Mom lets me help with the lettuce and cutting the green onions and mixing, but this is the first time I made the whole thing. I really like my salad. I got an A on my project. It is one of the reasons social studies is my favorite subject.


Thursday, July 26, 2012

Solar Powered Stars


For Thursday Things this week, Mom and I made a solar oven in our back yard. I didn't have the stuff to make s'mores like the experiment where I got the idea so I up-cycled crayons. We used the power of the sun to make star shaped crayons, Solar Powered Stars. Get it?


I have re-made crayons in the oven and it takes just about the same amount of time, but you can't watch them cook and it isn't as much fun. I made the ones in the picture for Mother's Day. I think they make great art. I will make a post about the crayons next week.


To make the oven you need:
A box that opens like a pizza box or a shipping box
Foil
Black construction paper
2 Sheet protectors or plastic wrap
A bamboo skewer
tape and/or glue
something to cut with


First have a grown up cut a flap on three sides, in the top of box so that here is a window. Then glue a piece of foil to the bottom of the box and another on the flap. Next tape the construction paper to center of the bottom of the box. Then cut the sheet protector so that it is open and flat. Tape that to the inside of the window under the flap. We only needed one but if you need more plastic use more than one sheet and tape them together with clear tape. Finally tape the bamboo skewer so that it holds open the flap.


This was so much fun. I love how it works. The sunlight reflects off the flap into the plastic window. The light wave changes when it goes through the plastic, so it can't just leave again. It bounces around the inside of the box and the dark paper collects the heat and cooks the stuff. It took about 15-20 minutes to make our crayons, but I thought they were too melted. That is the same as the regular oven. Our thermometer on the table in full sunlight got to 105° and in the box at the end it showed at 120°. That is so great. Mom thinks that the thermometer might have been in direct sunlight inside the box so the temp isn't true and we need to test it again to be sure. We are going to make s'mores next time. I want to try nachos too, but I can't think of what else would be okay to cook and eat in my oven. 


I am so happy this worked right the first time. A lot of our stuff takes a few tries to work. I think it is because the directions at the site where I got the idea were so good. You can see that experiment here http://www.stevespanglerscience.com/experiment/solar-oven  . It is my favorite science site.


Tuesday, July 24, 2012

Volunteering


I have been trying to find a place to volunteer my time. There are lots of clubs and organizations in my town but they all expect kids to be 10 or even 14. I have a ways to go before I get there. 


I have found a couple of ways I can help online.


This is a place where I can make my art and share it with people who need a smile


 We Give Books   
  http://www.wegivebooks.org/


For every book I read online they give a book to the charity of my choice. My current campaign is for Reading Partners.


Today, I found a new way to help and it is fun even if it is like school.  I started a group so others could join in with me. For every question you get right they donate rice to hungry people.


I will keep looking for places to volunteer but I am glad I found something to do. I want to make the world a better place.


Monday, July 23, 2012

underwater viewer


I love projects that I can play with a lot. I really wanted to do this because it looked like fun. We got the idea from my second favorite website, Education.com. It would be my favorite except that even though they have fun stuff to do and we won their contest last Fall, they also have lots of school worksheets. They are fun to do, but they are still school. The project was for preschoolers but we thought if we took video under our pool it would make it more for kids my age. http://www.education.com/activity/article/underwater-viewer/


What you need for this is a coffee can or oatmeal container, plastic wrap and rubber bands. It is really easy to make. Just cover the open ends of the container with wrap and make it tight with rubber bands.


It is hard to see down under water because the light refracts in the water and in the ripples on the water surface. The viewer lets us see what is underwater with all that happening. In my refraction experiment you could really see how much the light bends in still water. The moving water adds more distortion to it.


We did have some problems with the video because the sun was so bright we couldn't see the image of what we were recording on the camera monitor. When we uploaded it to the computer, I was really happy to see that so much of it came out great. We really could see the bottom of the pool easy in the video. I still use it. Mom says we can make another one out of a coffee can and it won't get soggy. We don't drink coffee so I had to wait for my awesome granny to give us a can. 


Saturday, July 21, 2012

Saturday Shout Out 7/21

Hello, 
How is everyone this week? I have been working through summer school this week. I already have half of my summer math goal done and my reading is getting better, only my writing is not good yet. Mom agreed that I can start my school lessons next week so I can get ahead for the school year. I really want to do well this year. I am starting behind, so I have to work harder, but I want to get into the STEM academy in 6th grade.  We didn't get any new summer projects done but we have a bunch for next week. 

Great big hellos go out to The Dalles OR, Mountain View CA, Dallas and Fort Worth TX,  and Council Bluffs IA. It is so much fun to see those cities every week. 

I got a new country on my blog this week, Azerbaijan. Another one I had never heard of before, even though it is right next to countries I see all the time.  The article on Wikipedia had some really great pictures of the country. I love how its history dates back to 10,000BC all the way to really great modern architecture.


File:Azerbaijan economic regions.png
Source


File:Azeri Square.JPG
Source


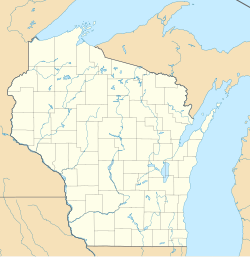
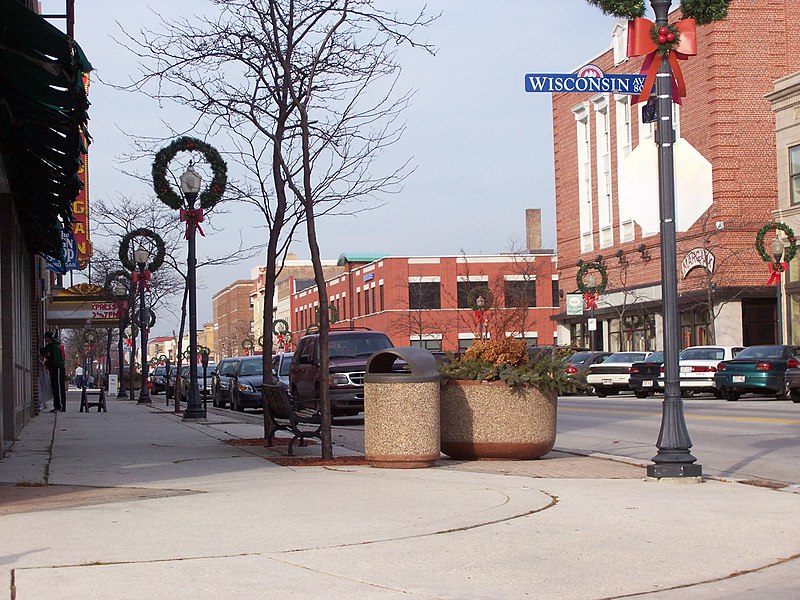
The city I chose to look at this week, Sheboygan WI, was backwards. I mean, I went backwards to choose it. Usually I see it on my list then choose it. This time I learned about it then saw it on my list. It is great when that happens. 

Sheboygan is located in Wisconsin
Source


File:SheboyganWisconsinDowntown1.jpg
Source


Sheboygan is the site of the Rockets for Schools (http://www.rockets4schools.org/)  rockets launches every year. I would so love to get involved in that. I can't wait to go to school in Wisconsin so I have a chance.  I probably won't get to see it next spring but for sure the spring after that.

 Sheboygan has a great website http://www.ci.sheboygan.wi.us/,  with lots of great information about the city and its history, and you can follow the city on Twitter https://twitter.com/sheboyganwisc


Shout Out to all the wonderful people who visited my blog this week and to the awesome places where they live. I am so grateful to learn about them each week.


Friday, July 20, 2012

Marshmallow Construction


I was looking forward to this project all summer. I love building things and marshmallows are the perfect shape to build things with. It was too warm so the marshmallows got really sticky but I didn't mind. I had so much fun and I can't wait to do it again. I loved checking this off my Summer To-Do List.


For this project you need marshmallows in different sizes and tooth picks or bamboo skewers. I saw a video where they used uncooked spaghetti also. We got our ideas from this website http://www.apartmenttherapy.com/marshmallow-animal-favors-48036


Tuesday, July 17, 2012

Fossil Hunting


Hunting for fossils isn't easy. I would like someday to go to a place where there are lots just to do it once. It is easy to make fossils. For this take a look back Tuesday, Mom found some pictures from my second grade science project.


For this project we took air dry clay and imprinted different leaves and branches into it until it was almost dry. For fun we made dino imprints too.  These kinds of fossils are called external molds. I want to do it again and add something to the mold to fill it and make a cast type fossil.


Monday, July 16, 2012

Foil Stained Glass


This is a great project, especially because it was present for my cousin Michelle.  It wasn't as easy as it looks but we figured it out. 


 What you need for this is

Foil
Glue
Sharpies 
Cardboard
Construction Paper

We discovered that you have to use permanent markers for this. The regular kid markers rub off and they aren't as dark. Hot glue is the best for this, but regular glue works too, it just takes longer.  Just draw your picture on the cardboard. Make it a big picture without a lot of details. My picture had lots of lines but when we got to the glue part they didn't show through. Use your glue to outline all the lines on your picture. Then, cover the dry glue with foil and press it down so the glue forms ridges. You may have to use more than one layer of foil. It is real easy to poke through it. You color inside the ridges with the sharpies. When you are done coloring, outline the ridges with black. It looks so neat. We used construction paper for the frame.

There is a really great tutorial here ↓  Theirs came super cool! http://www.housingaforest.com/tinfoil-and-sharpies/

 I found it in my online newspaper Lian's Picks for Kid Summer Fun


Saturday, July 14, 2012

Saturday Shout Out 7/14

Hello


How was your week everyone? Mine was great. I went to my cousin's birthday party last weekend and I have been doing fun projects on my Summer List. Our new clay and paint came in this week so we have lots of great plans for next week. Also, my fourth grade text books came on Friday. My science and social study books are much bigger and I can't wait to get started on them. The best part is the art kit. It is always my favorite school supply to get and I can't believe they just give it to us.

Before I get to the city I chose to learn more about, I want to say "Hello and thank you" to true blue places like The City of The Dalles OR, Mountain View CA, and Tomball TX. I see these cities everyday on my blog list and I am so grateful to have regular readers.


This week I chose to have a look at Redwood City CA. I like its name and my uncle lives nearby there. It was a great choice. Redwood City is  a Charter City. That means that it can decide how the city is governed instead of having to follow state laws about it. They have a city manager instead of a mayor and laws are made and voted on by the city residents and not by the city council. I had never heard of this before. I love learning new things. This is the kind of thing I started Adventures in Geography to learn. 

They have such a great website http://www.redwoodcity.org/  with lots of information about the city including history and pictures. I love pictures. In the photo gallery there is file for architecture. The buildings they show are really terrific. Exactly the kind of buildings I like to draw. Plus I liked reading about the history of the city library, right on the front page. It seems like a really nice place to live.

You can get more information about Redwood City at


Shout Out to all the wonderful people who visited my blog this week and to the awesome places where they live. 


Friday, July 13, 2012

Perry Family Cookie Recipe


This week I made my favorite cookies. Mom makes them all the time and my dad and I love them.

The basic recipe is 

3 cups Old Fashioned Oats
(you can use quick oats or flavored oatmeal)
1 c of applesauce (any flavor)
1/4 c of skim milk
1 tbsp of sugar (optional)

Extras
craisins
dries fruit
berries
nuts
hazelnut spread
Cinnamon
Brown Sugar
Coconut

For mine today, I used 1/3 a bag of crasins,   a lot of cinnamon and 1 tsp of sugar

Directions: 
Mix together the oats and the applesauce and add any extras you want. Then use just enough milk to moisten the mixture. Let it sit for a few minutes to soak the oats. You know it's ready when the batter sticks together. Scoop spoonfuls onto a cookie sheet and bake at 400 for 10-12 minutes or until they start to get brown. They won't be soft like regular cookies. You can also bake them in a cake round or square and cut the cookies into bars. That is really good.

We like them served cold and we usually keep ours in the freezer. They are really filling so you don't want to munch on them like regular cookies. You just need a few.


Mom got the original recipe here http://www.wisebread.com/whats-cooking-breakfast-cookies-for-the-life-hacker-on-the-go and then we made up a bunch of batches with different combinations to see how we liked it. We didn't really like the bananas in the original. I love dried cherries and walnuts or almonds and coconut. I really like when we add the hazelnut spread. We don't usually add sugar unless cinnamon is the main flavor and you really don't need sugar if you use flavored oatmeal. This is my favorite kind of cookie. I hope you like it too.


Tuesday, July 10, 2012

Ka Blam


Last Summer we did a lot of experiments with fizzy stuff. Things like baking soda, antacid tablets, yeast and fizzy drink tabs.We didn't always get a chance to blog about it.


 This is one of my favorites. We tried all afternoon to get a balloon to self inflate and explode, using Nuun drink tablets and water. 


The water and the tablets reacted so we were sure it should work but it always fizzed out before the balloon inflated all the way.  Dad finally came up with the idea to add water to the tablets instead of the other way around and the reaction was humungous. It was so cool when the balloon popped.


Later this summer we are going to try this again with vinegar and baking soda. I can't wait. I love messy experiments.


Monday, July 9, 2012

Make a Silhouette


 Make Something Monday


I wanted to make melted crayon gift for my Gran. Mom suggested a silhouette since it is on my summer list. It is not as easy as it looks to make one. In the end we used the photo editor, paint.net, to make it. 


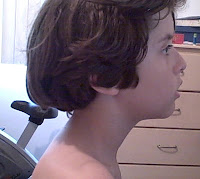
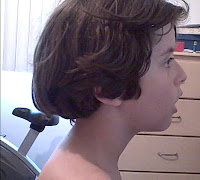
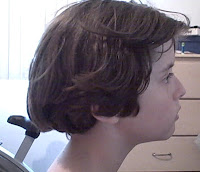
 First we made several photos of a side shot of my face. Once we found one I liked, I opened it into the editor. Using the eraser tool, I erased everything in the photo except my face and neck. After that I used the feather tool to blur the edges of my face. Then, with the magic wand tool, I selected the white portion of the photo and then inverted the section so that my face was selected.  Finally I used the fill bucket to make that part black. When we tried to print we discovered that our printer was out of ink so once it was printed I colored it in with black crayon.


Mom helped me with the screen shots here.


What People Are Reading This Week

Click Every day! The Autism Site